Embarking on a painting project? Great! But before you even think about cracking open that can of paint, there’s a crucial step that many overlook: proper wall preparation. Think of it as the foundation of a beautiful paint job. Skipping this step is like building a house on sand – it might look good initially, but it won’t last. This guide will take you through the essential steps to prep your walls, ensuring a smooth, durable, and professional-looking finish.
From identifying different wall surfaces and assessing damage to gathering the right tools and materials, we’ll cover everything you need to know. We’ll delve into cleaning, repairing imperfections, sanding for smoothness, and priming for optimal paint adhesion. We’ll also tackle specific issues like water stains, mold, and textured walls, ensuring you’re equipped to handle any challenge your walls may present.
So, let’s get started and transform your walls into a work of art!
Assessing Wall Condition
Before you even think about picking up a paintbrush, a thorough assessment of your walls is absolutely crucial. This initial step determines the success of your paint job. Neglecting this crucial phase can lead to a less-than-perfect finish, with issues like peeling paint, visible imperfections, and poor adhesion. A well-prepared surface is the foundation for a professional-looking result that lasts.
Common Wall Surface Types
Understanding the different wall surfaces in your home is the first step in proper preparation. Each surface type has unique characteristics that impact how paint adheres and the preparation required.
- Drywall: This is one of the most common wall materials in modern homes. Drywall, also known as gypsum board or sheetrock, is made of a gypsum core sandwiched between paper facing. It’s relatively easy to work with and offers a smooth surface, but it’s susceptible to damage and requires proper sealing before painting.
- Plaster: Plaster walls are often found in older homes. They are typically made of a mixture of lime, sand, and water applied in layers over a lath framework. Plaster walls can be very durable but may crack over time due to settling or moisture.
- Wood Paneling: Wood paneling comes in various forms, including solid wood planks, plywood panels, and engineered wood. It’s often used for decorative purposes and can add warmth and character to a room. Wood paneling requires careful preparation to ensure good paint adhesion, especially if it has a glossy finish.
- Concrete/Cement: Common in basements and some exterior walls, concrete and cement surfaces are porous and can be challenging to paint. Proper priming and the use of specialized paints designed for these surfaces are essential.
Surface Preparation Based on Material
The preparation required varies significantly depending on the wall material. Each material has unique properties that affect how paint interacts with it.
- Drywall: New drywall typically needs to be primed with a drywall primer to seal the surface and promote paint adhesion. Existing drywall should be inspected for damage and repaired before priming.
- Plaster: Plaster walls may require more extensive preparation, including patching cracks, filling holes, and sanding. A high-quality primer specifically designed for plaster is recommended.
- Wood Paneling: Wood paneling needs to be cleaned and sanded to remove any existing finish and create a surface that the paint can grip. A stain-blocking primer is often necessary to prevent the wood’s tannins from bleeding through the paint.
- Concrete/Cement: These surfaces need to be thoroughly cleaned and primed with a concrete primer to seal the porous surface. This helps the paint adhere properly and prevents moisture from damaging the paint.
Identifying Existing Damage
Before you begin painting, it’s critical to identify and address any existing damage on your walls. Ignoring these issues will result in a poor paint job that highlights the imperfections rather than concealing them.
- Cracks: Cracks can appear in walls due to settling, temperature changes, or structural issues. Small cracks can often be filled with patching compound, while larger cracks may indicate more serious problems that require professional attention.
- Holes: Holes can be caused by nails, screws, or other impacts. Small holes can be filled with patching compound, while larger holes may require more extensive repair, such as replacing a section of drywall.
- Peeling Paint: Peeling paint indicates a problem with adhesion. This can be caused by moisture, poor surface preparation, or using the wrong type of paint. The old paint needs to be removed before repainting.
- Water Stains: Water stains can indicate a leak or moisture problem. It is essential to address the source of the water before painting, as painting over water stains will not solve the underlying issue. The stains often need to be sealed with a stain-blocking primer.
- Mold and Mildew: The presence of mold or mildew indicates a moisture problem and can pose health risks. Before painting, the affected areas must be cleaned with a mold-killing solution and the source of the moisture addressed.
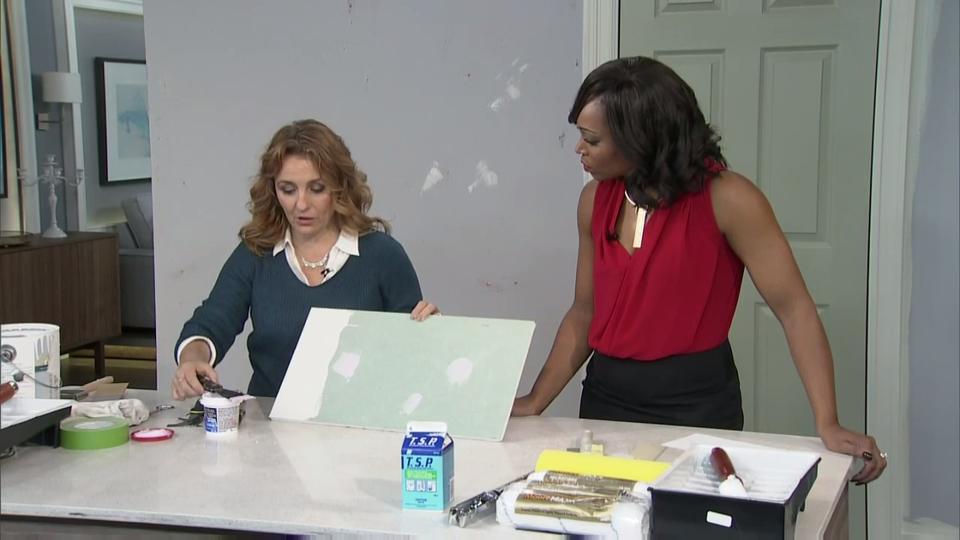
Gathering Essential Tools and Materials
 | Painting room tips ...")
Preparing your walls for painting is a task that demands the right tools and materials. Having everything ready before you start will significantly streamline the process and ensure a professional-looking finish. This section Artikels the essential items you’ll need to gather, providing detailed explanations to help you choose the correct tools and materials for your project.
Tools for Wall Preparation
Having the correct tools is fundamental to achieving a smooth and durable paint job. This list covers the tools you’ll need to prepare your walls effectively, from patching to sanding.
- Putty Knives: Essential for applying and smoothing patching compound. You’ll need a variety of sizes:
- A 1-inch putty knife for small cracks and nail holes.
- A 4-inch or 6-inch putty knife for larger areas and feathering out the compound.
- A flexible putty knife is beneficial for smoother application and minimizing ridges.
- Sanders: Used to smooth patched areas and prepare the surface for painting. Consider these options:
- Sanding Sponges: Flexible and great for curved surfaces and detailed work.
- Hand Sander: A basic tool for flat surfaces.
- Orbital Sander (Optional): For larger areas, an orbital sander can speed up the process but requires caution to avoid removing too much material. Always wear a dust mask when sanding.
- Sanding Block: A rigid block that holds sandpaper, ideal for flat surfaces.
- Scraper: Used to remove loose paint, wallpaper remnants, or other surface imperfections. A wide scraper with a sharp blade is recommended.
- Drop Cloths or Plastic Sheeting: To protect your floors and furniture from paint splatters and dust.
- Painter’s Tape: For masking off trim, windows, and other areas you don’t want to paint. Choose a tape specifically designed for the surface you are painting.
- Utility Knife: Useful for scoring painter’s tape and opening paint cans.
- Paint Can Opener: For opening and closing paint cans safely.
- Stir Sticks: To thoroughly mix your paint and primer.
- Brushes and Rollers: For applying paint and primer. The size and type will depend on the area you’re painting. Consider:
- Angled sash brush for cutting in around edges and trim.
- Roller with appropriate nap for your wall texture (e.g., a shorter nap for smooth walls and a longer nap for textured walls).
- Dust Mask or Respirator: Protects you from inhaling dust and fumes. A respirator with replaceable filters is recommended.
- Safety Glasses: To protect your eyes from dust and debris.
Sandpaper Grit Guide
Choosing the correct sandpaper grit is crucial for effective sanding. The grit number indicates the coarseness of the sandpaper; lower numbers mean coarser grits, while higher numbers mean finer grits. This table provides a guide to the various sandpaper grits and their recommended uses.
| Grit Number | Description | Recommended Use | Example |
|---|---|---|---|
| 40-80 | Coarse | Removing heavy imperfections, stripping old paint, rough sanding. | Stripping paint from a weathered wooden door. |
| 100-150 | Medium | Smoothing patched areas, preparing bare wood, removing minor imperfections. | Sanding down patched drywall before priming. |
| 180-220 | Fine | Final sanding before painting, smoothing primer, preparing for a smooth finish. | Lightly sanding a primed wall to create a smooth surface for the topcoat. |
| 320+ | Very Fine | Polishing, between-coat sanding for a super-smooth finish. | Sanding between coats of varnish on furniture. |
Materials for Wall Preparation
Selecting the right materials is just as important as having the right tools. Here’s a comprehensive list of the materials you’ll need to properly prepare your walls for painting.
- Paint Primer: Crucial for adhesion, sealing the surface, and providing a uniform base for the paint. Choose a primer appropriate for the type of wall (e.g., drywall, wood) and the type of paint you’ll be using. Consider:
- Latex Primer: Versatile and suitable for most interior walls.
- Oil-Based Primer: Best for sealing stains and preventing bleed-through, especially on previously painted surfaces.
- Patching Compound (Spackle): For filling nail holes, cracks, and other imperfections. Choose a compound appropriate for the size of the repair. Consider:
- Lightweight Spackle: Easy to sand and ideal for small repairs.
- Vinyl Spackle: Durable and suitable for larger repairs.
- Joint Compound (Mud): Used for larger repairs and filling seams in drywall.
- Caulk: For sealing gaps around windows, doors, and trim. Choose a paintable caulk.
- Cleaning Solution: To clean the walls before painting, removing dirt, grease, and other contaminants. Consider:
- TSP (Trisodium Phosphate): A strong cleaner, but use with caution and wear gloves.
- Mild Soap and Water: A gentler option for less soiled walls.
- Degreaser: For removing grease and oil stains, particularly in kitchens and bathrooms.
- Wall Repair Tape (for drywall cracks): To reinforce cracks and prevent them from reappearing.
- Putty Knife: For applying and smoothing patching compound.
- Sandpaper: To smooth patched areas and prepare the surface for painting.
- Tack Cloth: To remove sanding dust from the walls before painting.
- Paint: The color and type of paint you have chosen for your project.
Cleaning the Walls

Cleaning your walls is a crucial step in preparing them for a fresh coat of paint. It removes dirt, dust, grease, and mildew, ensuring the paint adheres properly and provides a smooth, durable finish. Skipping this step can lead to paint peeling, bubbling, or an uneven appearance. This section will guide you through the proper methods for cleaning your walls.
Methods for Cleaning Walls
The best cleaning method depends on the type of wall surface and the grime present. Understanding these differences is key to achieving optimal results.
- Dusting: Before any wet cleaning, always start by dusting the walls. This removes loose dust and cobwebs that could smear during washing. Use a microfiber cloth, a soft brush attachment on your vacuum cleaner, or a dry duster. Begin at the top and work your way down.
- Washing: For general dirt and grime, a mild cleaning solution is usually sufficient. For tougher stains, you might need a stronger cleaner. Always test the cleaning solution in an inconspicuous area first to ensure it doesn’t damage the paint.
- Degreasing: Kitchens and areas near cooking surfaces often accumulate grease. Use a degreasing cleaner specifically designed for walls. Follow the manufacturer’s instructions carefully.
- Mildew Removal: Mildew thrives in damp environments. If you see mildew, it needs to be treated before painting. Use a mildew-killing cleaner, following the product’s instructions, which often include allowing the cleaner to sit on the surface for a specific time before rinsing. Ensure proper ventilation during this process.
Cleaning Solutions Based on Wall Surface and Grime
Choosing the right cleaning solution is essential for effective cleaning and protecting your walls. Here’s a guide to help you select the appropriate cleaner for different situations.
- Painted Walls: For most painted walls, a solution of warm water and mild dish soap is effective. Avoid abrasive cleaners that can scratch the paint.
- Wallpaper: Cleaning wallpaper requires extra care. Always check the wallpaper manufacturer’s instructions. Generally, a damp sponge and mild soap solution are recommended. Avoid soaking the wallpaper.
- Grease: For grease, a degreasing cleaner specifically formulated for walls is recommended. Apply it according to the product’s instructions, which often involve letting it sit for a short time before wiping.
- Mildew: For mildew, use a mildew-killing cleaner containing bleach or other antifungal agents. Always follow the product’s safety instructions and ensure adequate ventilation.
Step-by-Step Procedure for Cleaning Walls
Following a systematic approach ensures your walls are thoroughly cleaned and ready for painting.
- Preparation: Protect the floor and any furniture with drop cloths. Gather all your cleaning supplies: the cleaning solution, sponges or microfiber cloths, a bucket of clean water, and a clean rinsing sponge or cloth. Wear gloves to protect your hands.
- Dusting: Use a microfiber cloth or a soft brush attachment on your vacuum to remove loose dust and cobwebs from the walls. Start at the top and work your way down.
- Washing: Dip your sponge or cloth into the cleaning solution, wring it out well to prevent dripping, and gently wipe the walls, starting at the top and working down. Avoid applying too much pressure.
- Rinsing: Rinse the washed areas with a clean sponge or cloth dipped in plain water to remove any soap residue. Change the rinse water frequently.
- Drying: Allow the walls to dry completely. This may take several hours, depending on the humidity and ventilation. Ensure the walls are completely dry before proceeding to the next step in the painting process.
- Inspection: After the walls are dry, inspect them for any remaining dirt, stains, or mildew. If necessary, repeat the cleaning process or address any specific problem areas.
Important Note: Always test any cleaning solution in an inconspicuous area before applying it to the entire wall. This helps ensure that the cleaner doesn’t damage the paint or wallpaper.
Repairing Imperfections
Now that your walls are clean, it’s time to address any imperfections. This is a crucial step because a smooth, even surface is essential for a professional-looking paint job. Filling holes, cracks, and dents ensures the paint adheres properly and doesn’t highlight these flaws. This section will guide you through repairing various types of damage, from small nail holes to more significant imperfections.
Filling Small Holes and Cracks
Minor imperfections like nail holes and hairline cracks are common and easily fixed. The process involves filling the damage with a suitable compound, allowing it to dry, and then sanding it smooth. This process ensures a seamless surface ready for painting.To fill these imperfections, you will need the following:
- Spackle or Joint Compound: Choose a spackle specifically designed for small holes and cracks, or use lightweight joint compound.
- Putty Knife: A 2-3 inch putty knife is ideal for applying the filler.
- Sandpaper: Medium-grit sandpaper (around 150-220 grit) for smoothing the filled areas.
- Dust Mask: To protect yourself from inhaling dust while sanding.
Here are the steps to follow:
- Prepare the Area: Gently widen any cracks with the tip of your putty knife to ensure the filler can properly adhere. Remove any loose debris.
- Apply the Filler: Using your putty knife, scoop up a small amount of spackle or joint compound. Apply it to the hole or crack, pressing it firmly into the damaged area. Overfill slightly.
- Smooth the Filler: Hold the putty knife at a slight angle and scrape across the filled area to remove excess compound and create a flush surface.
- Let it Dry: Allow the filler to dry completely. The drying time will vary depending on the product and the humidity, but typically it will take a few hours. Check the manufacturer’s instructions on the product label for specific drying times.
- Sand the Surface: Once the filler is dry, use your sandpaper to smooth the patched area. Sand in a circular motion, feathering the edges to blend it with the surrounding wall.
- Clean the Area: Wipe away any sanding dust with a damp cloth or tack cloth.
Repairing Larger Damage
Dents, gouges, and other significant damage require a different approach. The key is to use a patching compound that can build up the damaged area and provide a solid base for painting. The choice of patching compound will depend on the size and depth of the damage.Here’s what you’ll need:
- Patching Compound: For larger damage, use a patching compound designed for this purpose. Consider using a fast-drying or all-purpose joint compound, depending on the depth of the damage.
- Putty Knife or Trowel: A wider putty knife (4-6 inches) or a small trowel will be helpful for applying the patching compound.
- Sandpaper: Coarser sandpaper (around 100-150 grit) for initial sanding, followed by medium-grit sandpaper (150-220 grit) for smoothing.
- Dust Mask: To protect yourself from inhaling dust while sanding.
- Primer: A primer specifically designed for patching compounds will ensure the paint adheres properly.
Here’s how to repair larger damage:
- Prepare the Area: Clean the damaged area thoroughly, removing any loose paint or debris. If the damage is deep, consider using a utility knife to create a slightly beveled edge around the perimeter.
- Apply the Patching Compound: Using your putty knife or trowel, apply the patching compound to the damaged area. Apply in layers, allowing each layer to dry before applying the next, especially for deep gouges. Overfill slightly.
- Let it Dry: Allow the patching compound to dry completely. The drying time will vary depending on the product and the depth of the patch.
- Sand the Surface: Use sandpaper to smooth the patched area, feathering the edges to blend it with the surrounding wall. Start with coarser grit and then switch to a finer grit for a smooth finish.
- Prime the Patch: Apply a coat of primer to the patched area. This will help the paint adhere and ensure a consistent finish.
- Clean the Area: Wipe away any sanding dust with a damp cloth or tack cloth.
Sanding Patched Areas for a Smooth Surface
Sanding is critical for achieving a smooth, seamless finish after patching. Proper sanding removes any imperfections in the patching compound and blends it seamlessly with the surrounding wall. The goal is to create a surface that is virtually undetectable after painting.Here are the steps for sanding patched areas:
- Assess the Patch: Once the patching compound is dry, visually inspect the patched area. Look for any high spots or rough edges.
- Choose the Right Sandpaper: Select the appropriate grit sandpaper. For initial sanding of larger patches, start with a coarser grit (100-150). Then, switch to a medium grit (150-220) for the final smoothing.
- Sand in a Circular Motion: Use a sanding block or your hand to sand the patched area in a circular motion. This helps to evenly remove material and create a smooth surface.
- Feather the Edges: Gradually blend the edges of the patched area into the surrounding wall. This prevents a noticeable line or ridge.
- Check Your Work: After sanding, wipe away the dust and inspect the surface. Use a flashlight held at an angle to highlight any remaining imperfections.
- Repeat if Necessary: If you see any remaining imperfections, re-sand the area until it is smooth.
- Clean the Area: Wipe away all sanding dust with a damp cloth or tack cloth before priming or painting.
Sanding for Smoothness
Sanding is a crucial step in wall preparation, ensuring the paint adheres properly and the final finish is flawless. It removes imperfections, smooths the surface, and creates a slightly textured profile that paint can grip onto. Skipping this step can lead to a rough, uneven paint job, highlighting any existing flaws in the wall.
Importance of Sanding Walls
Sanding plays a pivotal role in achieving a professional-looking paint job. It’s more than just making the wall feel smooth; it’s about creating the ideal surface for paint to bond.Sanding achieves several key benefits:
- Removes Imperfections: Sanding eliminates bumps, ridges, and other surface irregularities, such as dried drips from previous paint coats or patched areas.
- Enhances Paint Adhesion: Sanding roughens the surface slightly, providing a better grip for the paint. This leads to improved adhesion and durability, reducing the likelihood of peeling or flaking.
- Creates a Uniform Surface: Sanding ensures an even surface across the entire wall, which is essential for a consistent and aesthetically pleasing finish.
Types of Sanders and Their Applications
Selecting the right sander depends on the size of the project and the condition of the walls. There are several types available, each suited for different tasks.Here’s a breakdown of common sanders and their ideal uses:
- Hand Sanders: These are simple and inexpensive, consisting of a handle and a pad to hold sandpaper. They are best for small areas, detail work, and tight corners. The user applies manual pressure to sand the surface.
- Orbital Sanders: Orbital sanders, also known as random orbit sanders, use a circular motion to sand. They are suitable for larger flat surfaces and are less likely to leave swirl marks compared to other power sanders. They are good for general sanding before painting.
- Pole Sanders: These sanders attach to a long pole, allowing you to sand high walls and ceilings without a ladder. They typically use sandpaper sheets attached to a sanding head. These are designed for drywall and are excellent for large surfaces.
Detailed Procedure for Sanding Walls
Following a systematic approach ensures effective and efficient sanding. This involves choosing the right sandpaper grit and implementing dust control measures.Here’s a step-by-step guide:
- Gather Supplies: You’ll need a sander (hand, orbital, or pole), sandpaper of varying grits (typically medium to fine), a dust mask or respirator, safety glasses, drop cloths, and a vacuum cleaner with a brush attachment.
- Prepare the Room: Cover furniture and floors with drop cloths. Open windows for ventilation, or use an air purifier.
- Select Sandpaper Grit: The grit number refers to the size of the abrasive particles on the sandpaper.
- Medium Grit (100-150): Use this for initial sanding to remove imperfections, such as patching compound.
- Fine Grit (180-220): Use this for final sanding to smooth the surface and prepare it for paint.
- Start Sanding:
- If using a hand sander, wrap the sandpaper around the sanding pad.
- If using a power sander, attach the sandpaper to the sander according to the manufacturer’s instructions.
- Sand in the direction of the imperfections, or in circular motions if using an orbital sander.
- Apply even pressure and avoid pressing too hard, which can create uneven sanding.
- Address Imperfections: Regularly check the wall for imperfections and sand them until smooth.
- Dust Control:
- Wear a dust mask or respirator to avoid inhaling dust particles.
- Use a vacuum cleaner with a brush attachment to remove dust as you sand, especially if using a sander with a dust collection system.
- Wipe down the walls with a tack cloth or a damp cloth to remove any remaining dust.
- Inspect the Walls: Once sanding is complete, inspect the walls for any remaining imperfections. Repeat the sanding process if necessary.
Priming the Walls
Priming is a crucial step in the wall-painting process, often overlooked but essential for achieving a professional and long-lasting finish. It prepares the surface for paint, ensuring optimal adhesion, color consistency, and overall durability. Think of primer as the foundation upon which your beautiful paint job will rest.
Benefits of Using Primer
Primer offers several significant advantages that contribute to a superior paint job. It acts as a crucial intermediary between the bare wall and the topcoat, providing a range of benefits that impact both the appearance and longevity of the paint.* Improved Adhesion: Primer creates a strong bond between the wall surface and the paint, preventing peeling, cracking, and blistering.
This is particularly important on surfaces like drywall, which can be porous.
Color Consistency
Primer provides a uniform base, allowing the topcoat to achieve its true color and hiding any existing imperfections or variations in the wall’s color. This is especially helpful when transitioning from a dark color to a lighter one.
Stain Blocking
Certain primers are formulated to block stains from bleeding through the paint, such as water stains, smoke damage, or marker residue.
Enhanced Durability
By creating a better bond, primer extends the life of the paint job, making it more resistant to wear and tear.
Reduced Paint Consumption
Primer seals the surface, preventing the paint from being absorbed unevenly, which can lead to increased paint consumption.
Types of Primers
Choosing the right primer is essential for the best results. Different types of primers are designed for specific applications and surfaces. Consider the following table for an overview of common primer types:
| Type | Description | Best For | Pros | Cons |
|---|---|---|---|---|
| Oil-Based Primer | Made with oil resins. | Wood, previously painted surfaces, and stain blocking. | Excellent stain blocking, durable, good adhesion. | Longer drying time, strong odor, requires mineral spirits for cleanup, not ideal for all surfaces. |
| Water-Based (Latex) Primer | Made with water and acrylic resins. | Drywall, new construction, and general-purpose use. | Low odor, fast drying, easy cleanup with soap and water, flexible. | Less effective at blocking stains than oil-based, may not adhere well to glossy surfaces without proper preparation. |
| Shellac-Based Primer | Made with shellac flakes dissolved in alcohol. | Stain blocking (especially knots in wood), odor control. | Excellent stain blocking, fast drying, seals odors. | Strong odor, requires denatured alcohol for cleanup, not as durable as other types. |
| Specialty Primers | Designed for specific purposes (e.g., bonding primers, mildew-resistant primers). | Difficult surfaces, high-moisture areas. | Addresses specific issues. | May be more expensive, specific application requirements. |
Applying Primer Correctly
Proper application of primer is as important as choosing the right type. Following these steps ensures a smooth, even, and effective base for your paint.* Preparation: Ensure the walls are clean, repaired, and sanded as described in the previous steps. Protect surrounding areas with drop cloths and painter’s tape.
Application Techniques
Brush
Use a brush for cutting in around edges, trim, and corners. Dip the brush about one-third into the primer, tap off excess, and apply with even strokes.
Roller
Use a roller for large, flat areas. Pour primer into a paint tray. Dip the roller into the primer, rolling it back and forth to load it evenly. Apply the primer in a “W” or “M” pattern, then fill in the gaps. Overlap each stroke slightly.
Coverage
Apply a thin, even coat of primer. Avoid over-application, which can lead to drips and runs.
Drying Time
Allow the primer to dry completely according to the manufacturer’s instructions. Drying times vary depending on the primer type and environmental conditions. Generally, water-based primers dry faster than oil-based primers.
Second Coat (If Needed)
In some cases, especially when covering dark colors or dealing with porous surfaces, a second coat of primer may be necessary for optimal results.
Protecting the Work Area
Preparing your work area is crucial to a successful painting project. It prevents paint from damaging surfaces and ensures a cleaner, safer, and more efficient process. Taking the time to properly protect your surroundings will save you time, money, and frustration in the long run.
Importance of Protecting Surfaces
Paint splatters and drips are inevitable, no matter how careful you are. Protecting surfaces like floors, furniture, and trim is essential to prevent permanent damage and avoid costly repairs or replacements. This proactive approach ensures a professional finish and minimizes cleanup efforts. For instance, imagine a scenario where a gallon of paint spills on an unprotected hardwood floor. The cost of refinishing the floor could easily exceed the cost of the paint itself, highlighting the financial implications of neglecting surface protection.
Methods for Masking and Covering Surfaces
Masking and covering surfaces involves a combination of techniques and materials designed to shield them from paint. The specific approach depends on the type of surface and the level of protection required.
- Painter’s Tape: Painter’s tape is designed to adhere to surfaces without damaging them when removed. It comes in various widths and adhesive strengths for different applications. For delicate surfaces like freshly painted walls or wallpaper, use low-tack painter’s tape. For trim, baseboards, and window frames, standard painter’s tape works well. Always press the tape firmly to ensure a good seal and prevent paint from bleeding underneath.
- Drop Cloths: Drop cloths are essential for protecting floors and furniture. They are available in various materials, including canvas, plastic, and paper. Canvas drop cloths are durable and reusable, making them ideal for frequent painting projects. Plastic drop cloths are waterproof and inexpensive, suitable for one-time use. Paper drop cloths are a budget-friendly option for light-duty protection.
When using drop cloths, ensure they are large enough to cover the entire area and overlap at the seams to prevent paint from seeping through.
- Plastic Sheeting: Plastic sheeting is excellent for protecting furniture, fixtures, and other items that cannot be easily moved. It is available in various thicknesses, with thicker sheeting offering greater protection against spills and splatters. Use painter’s tape to secure the plastic sheeting to the edges of the items you are covering.
Preparing the Work Area: A Detailed Guide
Creating a safe and efficient workspace is paramount for a successful painting project. Proper preparation minimizes hazards and optimizes the painting process.
- Ventilation: Adequate ventilation is crucial to remove paint fumes and ensure a safe working environment. Open windows and doors to allow fresh air to circulate. If natural ventilation is insufficient, use fans to circulate air and exhaust fumes. When painting indoors, especially in enclosed spaces, it’s essential to ensure a good airflow to prevent the buildup of volatile organic compounds (VOCs) which can be harmful.
For example, according to the Environmental Protection Agency (EPA), prolonged exposure to high concentrations of VOCs can lead to respiratory problems and other health issues.
- Safety Precautions: Wear appropriate safety gear, including eye protection (goggles) and a respirator, especially when working with oil-based paints or spray painting. Always read and follow the manufacturer’s instructions for the paint you are using. Keep the work area clear of clutter and potential tripping hazards. Have a first-aid kit readily available in case of accidents.
- Furniture and Fixture Protection: Remove furniture from the room if possible. If this is not feasible, move furniture to the center of the room and cover it completely with plastic sheeting. Remove or cover light fixtures, switch plates, and outlet covers with painter’s tape.
- Floor Protection: Cover floors with drop cloths, extending them beyond the painting area to catch drips and splatters. Secure the drop cloths with painter’s tape to prevent them from shifting during the painting process.
- Surface Preparation: Clean the walls to remove any dust, dirt, or debris. Repair any imperfections, such as cracks or holes, with spackle or patching compound. Sand the repaired areas smooth. This will help the paint adhere properly.
- Masking: Use painter’s tape to mask off trim, baseboards, window frames, and any other areas you do not want to paint. Press the tape firmly to create a tight seal and prevent paint from bleeding underneath.
Addressing Specific Wall Issues
Dealing with specific wall issues is crucial for achieving a professional and lasting paint job. Ignoring these problems can lead to paint failure, uneven finishes, and the recurrence of the underlying issues. Addressing these problems head-on ensures a smooth, durable, and aesthetically pleasing result.
Dealing with Water Stains
Water stains can be unsightly and, more importantly, indicate a potential leak or moisture problem that needs attention. The process involves identifying the source of the water, treating the stain, and preventing its recurrence.
- Identify the Source: Before you begin, thoroughly investigate the source of the water stain. Look for leaks in the roof, plumbing issues, or condensation problems. Addressing the root cause is critical to prevent future stains.
- Cleaning the Stain: Once the source is addressed, clean the stain. Use a stain-blocking primer. A solution of trisodium phosphate (TSP) and water can be used to remove surface dirt and residue. Be sure to wear gloves and eye protection. Apply the TSP solution, let it sit for a few minutes, and then rinse with clean water.
Allow the wall to dry completely.
- Applying Stain-Blocking Primer: Apply a high-quality, stain-blocking primer. This type of primer is specifically designed to seal the stain and prevent it from bleeding through the new paint. Apply the primer according to the manufacturer’s instructions, typically one or two coats.
- Painting the Wall: After the primer has dried completely, you can proceed with painting the wall. Apply two coats of your chosen paint color for optimal coverage and durability.
Preparing Walls with Mold or Mildew
Mold and mildew are common problems in damp or poorly ventilated areas. They not only damage the paint but can also pose health risks. Proper preparation is essential to eliminate the mold and prevent its return.
- Safety First: Before you begin, ensure your safety by wearing appropriate protective gear. This includes a respirator or mask, gloves, and eye protection. Work in a well-ventilated area.
- Cleaning the Mold: Clean the affected area thoroughly. Use a solution of one part bleach to three parts water. Apply the solution to the moldy areas and let it sit for 15-20 minutes. Scrub the area with a scrub brush to remove the mold. Rinse the area with clean water and allow it to dry completely.
- Applying Mold-Resistant Primer: After cleaning and drying, apply a mold-resistant primer. This primer contains ingredients that inhibit mold growth and help prevent future outbreaks. Apply the primer according to the manufacturer’s instructions.
- Painting the Wall: Once the primer is dry, you can paint the wall with a paint that contains mildewcide additives. This will further help prevent mold growth. Apply two coats of paint for the best protection and coverage.
Important Note: For extensive mold infestations or if you suspect the mold has penetrated deeply into the wall structure, consider consulting with a professional mold remediation specialist. They can assess the extent of the damage and recommend the appropriate course of action.
Handling Glossy Surfaces Before Painting
Glossy surfaces, such as those painted with high-gloss or semi-gloss paints, can pose a challenge for paint adhesion. The smooth, non-porous surface prevents the new paint from properly bonding. Preparing these surfaces is essential to ensure a durable and even finish.
To prepare glossy surfaces:
- Clean the Surface: Wash the surface with a degreasing cleaner to remove any dirt, grease, or contaminants that could interfere with paint adhesion. Rinse thoroughly and allow to dry.
- Sand the Surface: Lightly sand the glossy surface to create a slightly rough texture. This will help the new paint adhere. Use fine-grit sandpaper (e.g., 180-220 grit) and sand in the direction of the existing paint’s grain.
- Prime the Surface: Apply a bonding primer specifically designed for glossy surfaces. This type of primer is formulated to adhere to slick surfaces and provide a good base for the topcoat.
- Paint the Surface: Once the primer is dry, you can paint the surface with your chosen paint. Apply two coats for optimal coverage and durability.
Preparing for Textured Walls

Preparing textured walls for painting presents a unique set of challenges compared to smooth surfaces. The uneven nature of the texture can trap dirt and debris, making cleaning more difficult, and the increased surface area requires more paint. Achieving a uniform and aesthetically pleasing finish demands careful consideration of the texture type and the appropriate preparation techniques.
Challenges of Preparing Textured Walls
Textured walls, such as those with orange peel, popcorn, or knockdown finishes, introduce specific difficulties when painting. These challenges stem primarily from the surface’s irregularity.
- Cleaning Difficulties: The crevices and valleys of textured surfaces easily collect dust, dirt, and grime. Thorough cleaning is essential before painting to ensure proper paint adhesion.
- Increased Paint Consumption: Textured walls have a significantly larger surface area than smooth walls. This increased surface area leads to higher paint consumption and can affect the project’s budget.
- Potential for Uneven Coverage: The peaks and valleys of textured surfaces can cause uneven paint distribution, leading to variations in color and sheen. Achieving a uniform finish requires the right tools and techniques.
- Difficulty with Imperfection Concealment: Existing imperfections in the texture, such as cracks or dents, can be more challenging to conceal. The paint may not fill these imperfections adequately, making them more noticeable.
Methods for Dealing with Textured Surfaces
Several methods can be employed to prepare textured walls for painting, depending on the type and severity of the texture and the desired outcome. The approach chosen should address the specific characteristics of the texture.
- Thorough Cleaning: Begin by thoroughly cleaning the textured walls. Use a brush or vacuum to remove loose debris, followed by a solution of warm water and mild detergent to remove dirt and grime. Allow the walls to dry completely before proceeding.
- Priming: Priming textured walls is crucial. A high-quality primer will seal the surface, promote paint adhesion, and help to even out the color variations. For heavily textured surfaces, consider using a primer specifically designed for textured walls, which often has better filling properties.
- Skim Coating (for Significant Texture Reduction): For those seeking a smoother finish, skim coating might be the best solution. This involves applying a thin layer of joint compound over the entire wall surface, allowing it to dry, and then sanding it smooth. This process can significantly reduce the texture. However, it is a labor-intensive process.
- Texture Matching (for Repairs): If there are areas needing repair, such as cracks or holes, match the existing texture using a texture sprayer or a can of spray-on texture. Allow the repair to dry completely before priming and painting.
Application of Paint on Textured Walls
Applying paint to textured walls requires specific techniques to achieve a smooth and even finish. Proper tools and methods are critical for optimal results.
- Choosing the Right Tools: Select a paint roller with a nap appropriate for the texture. A longer nap roller (e.g., 1/2 inch to 3/4 inch) is generally recommended for textured walls, as it can reach into the crevices and valleys of the texture. For cutting in around edges, use a high-quality paintbrush.
- Applying Paint with a Roller: Load the roller evenly with paint and apply it to the wall in a W or M pattern. Overlap each stroke slightly to ensure complete coverage. Avoid excessive pressure to prevent the paint from being forced into the texture and creating an uneven finish.
- Using a Paintbrush for Edges and Corners: Use a paintbrush to “cut in” along the edges of the walls, around windows and doors, and in corners. Apply a generous amount of paint to ensure adequate coverage, and blend the brush strokes with the roller application.
- Applying Multiple Coats: Two coats of paint are generally recommended for textured walls to ensure complete coverage and a uniform color. Allow the first coat to dry completely before applying the second coat.
Final Inspection and Touch-Ups
Before you even think about grabbing your paintbrush, a thorough final inspection is crucial. This step ensures all your hard work pays off with a flawlessly painted surface. It’s the last chance to catch any lingering issues before you commit to the final coat, saving you time and preventing potential frustrations down the line.
Identifying Common Issues
A careful inspection will help identify imperfections. The following list Artikels what to look for:
- Missed Spots: Carefully scan the entire wall surface, checking for any areas where primer or paint was inadvertently skipped. This is particularly common around edges, corners, and behind fixtures.
- Uneven Coverage: Look for variations in paint sheen or color. These can indicate areas where the paint was applied too thinly or unevenly.
- Runs and Drips: Check for paint drips, runs, or sags, especially along edges, corners, and areas where paint might have pooled. These often occur if you’ve applied too much paint at once.
- Imperfections from Repair Work: Examine any areas you repaired, such as nail holes or cracks. Ensure they are completely smooth and blended seamlessly with the surrounding wall.
- Texture Variations: Ensure that the texture of the painted surface is consistent across the entire wall. Any differences could indicate issues with sanding, priming, or paint application.
- Dust and Debris: Check for any dust, hair, or other debris that may have landed on the wet paint.
The Touch-Up Process
Once you’ve completed your inspection, you may find that touch-ups are needed. This process involves addressing any minor imperfections and ensuring a uniform finish.
Here’s how to effectively perform touch-ups:
- Prepare Your Materials: Gather your leftover paint, a small brush or roller (depending on the area), a clean rag, and any necessary tools for minor repairs, such as spackle or sandpaper.
- Address Minor Imperfections: Use spackle to fill any small nail holes, cracks, or imperfections you may have missed during the initial repair phase. Allow the spackle to dry completely, then lightly sand the area smooth.
- Clean the Surface: Before applying paint, lightly wipe down the areas needing touch-ups with a clean, damp rag to remove any dust or debris.
- Apply Touch-Up Paint: Carefully apply a thin layer of paint to the affected areas, blending the edges seamlessly with the existing paint. Use a brush for small areas and a small roller for larger spots. Avoid over-applying the paint.
- Final Coat (Optional): If the touch-ups are noticeable, or if you’re concerned about color variations, you may need to apply a final, overall coat of paint to the entire wall. This will help to ensure a consistent finish.
- Allow to Dry and Cure: Let the touch-up paint dry and cure completely according to the manufacturer’s instructions before assessing the final result.
End of Discussion
In conclusion, mastering the art of wall preparation is the key to achieving a flawless paint job. By following these steps, you’ll not only enhance the aesthetic appeal of your space but also ensure the longevity of your paint. Remember, taking the time to properly prep your walls is an investment that pays off in the long run. So, grab your tools, roll up your sleeves, and get ready to create walls that will impress for years to come.
Happy painting!